


One day I was in my car stuck at a stop light and I looked at my little tree air freshener thinking that I need to go buy a new one because the smell had faded. If you are a designer or creative person, you will be able to relate with how picky we can be when it comes to normal everyday objects and how we wish they were designed a different way. In this case, I was thinking about how much potential an air freshener could have on my mood each day as I spend so much time in my car!
First I looked at Amazon as I normally do when searching for odd and specific things. I did find a few cute air fresheners but they were anywhere from $5-$15 for just ONE, but I don’t want to spend that kind of money knowing that I would need to replace it shortly. Who knows how long the scent lasts but it seems they are always kind of short-lived. So then I was thinking… how I could make EXACTLY what I am wanting for an affordable price and the smell can just be added/refilled as needed. And the idea of felt came to mind! Felt and embroidery floss are SO CHEAP! Then I thought, hey, I have a bunch of essential oils and they would be perfect to add for the scents. They are more natural than man-made chemicals, and can lift your mood and other things I will get into later.
So I put together 4 REALLY CUTE designs to share and I will give you step-by-step instructions on each. The four different designs I created include a cactus, lemon, pineapple and donut. I think you’ll agree that they all turned out pretty cute!
Materials:

- Felt (assorted colors), usually about $0.50 each
- Embroidery floss (assorted colors), usually about $0.50 each
- Embroidery needles
- Batting or cotton balls
- Scissors
- Pen
- Essential oils
- Toothpicks
- String/Stretchy String/Rubber Band, can buy string at dollar store for $1.00
Time needed: 1-2 hours, depending on the amount of detail you choose
Total cost: Less than $5 to get started depending on how many of the materials you already have
Now I’m going to share some of the benefits of essential oils. I would also like to suggest just a few of my favorite essential oils.

Lemon: Promotes clarity of thought and purpose with a fragrance that is invigorating, enhancing, and warming.
Peppermint: Purifying and stimulating to the conscience mind. May help attention, performance, and focus.
Lavender: Calming, relaxing, and balancing, both physically and emotionally. Also improves concentration and mental acuity.
Citrus Fresh: Stimulates the right brain to amplify creativity and well-being, eradicate anxiety, and works well as an air purifier.
Clarity: Promotes a clear mind and amplifies mental alertness and vitality. It increases energy when overly tired and brings greater focus to the spirit and mind.
If you would like to research more into Young Living Essential Oils including benefits, availability and pricing click here or to make a purchase, you can email a distributor by clicking here.
Directions:
Now I will dive into the nitty gritty… how to create each design! Here is a quick demonstration of the lemon air freshener. I have provided a stencil that you can use to cut out each design shape but feel free to make your own shapes and designs. Download the stencil here.


CACTUS DESIGN
- Print stencil & cut out shape.
- Outline the cactus shape on your color choice of felt in pen and then cut exactly on the pen lines to reduce the chances of the pen showing.
- Cut out 3 small circles out of your color choice to use as flowers at the top of each arm of the cactus.
- If you would like to put a pattern on one or both pieces of felt with the embroidery floss, do that before sewing them together. If you can still see pen marks, make that the “inside” of the cactus. I chose to do a dashed line, but you could also do “x’s” or “v’s” to create a cute cactus-like pattern. I only did a pattern on one side.
- Once you have created a pattern, fold each circle in half and put a stitch through to give it a more ruffled and flowery appearance at the top of each arm.
- Now sew the 2 sides together using a blanket stitch around the edge, this stitch is actually very easy, you can watch the simple tutorial here.
- As I sewed together each arm, I stuffed the arm with batting before continuing. You can use scissors, a capped pen or something like that to tuck the batting in.
- Once you have sewed all the way around and tied your last knot, add a small loop at the top so you can attach an elastic or string and hang in your car.
- Choose an essential oil or fragrance, dip a toothpick in, and insert into the bottom between the 2 pieces of felt. Make sure that you can still see the tip of the toothpick so that you can grab with tweezers and add more oil as desired!
- Now you have a cute and unique car air freshener that you re-use and add scent to time and time again.

PINEAPPLE DESIGN
- Print stencil & cut out shape.
- Outline the pineapple shape on your color choice of felt in pen and then cut exactly on the pen lines to reduce the chances of the pen showing. Also cut out pineapple stem.
- If you would like to add detail on one or both pieces of felt with the embroidery floss, do that before sewing them together. If you can still see pen marks, make that the “inside” of the pineapple. I chose to do several different stitching patterns in the center. Have fun with it, it doesn’t have to be perfect! I only did a pattern on one side.
- Now sew the 2 sides together using a blanket stitch around the edge, this stitch is actually very easy, you can watch the simple tutorial here.
Leave the top of the pineapple open and not stitched as well as the bottom part of the stem. - Stuff each piece with batting, you can use a scissor tip or a capped pen to tuck the batting in.
- Sew a simple stitch across the pineapple shape and the stem shape to connect them.
Once you have connected the two pieces, add a small loop at the top so you can attach an elastic or string and hang from your rearview mirror. - Choose an essential oil or fragrance, dip a toothpick in, and insert into the bottom between the 2 pieces of felt. Make sure that you can still see the tip of the toothpick so that you can grab with tweezers and add more oil when the time is needed!
- Now you have a cute and unique car air freshener that you can re-use and add scent time and time again.
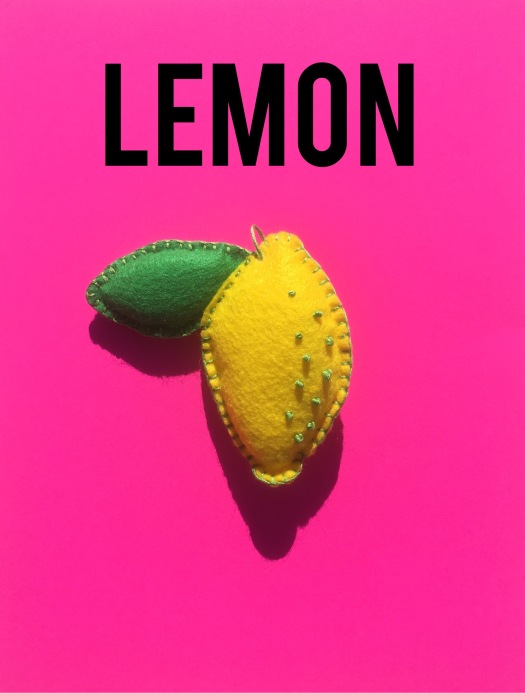
LEMON DESIGN
- Print stencil & cut out shape.
- Outline the lemon shape on your color choice of felt in pen and then cut exactly on the pen lines to reduce the chances of the pen showing. Also cut out lemon leaf.
- If you would like to add detail on one or both pieces of felt with the embroidery floss, do that before sewing them together. If you can still see pen marks, make that the “inside” of the lemon. I chose to do a very simple french knot to look like the pores of the lemon, it is a very easy knot with a simple tutorial here. I only did a pattern on one side.
- Now sew the 2 sides together using a blanket stitch around the edge, this stitch is actually very easy you can watch the tutorial here.
- Leave the top side open and not stitched as well as a portion of the edge of the leaf.
- Stuff each piece with batting, you can use scissors or a capped pen to tuck the batting in.
- Once you have connected the two pieces, add a small loop at the top so you can attach an elastic or string and hang in your car.
- Choose an essential oil or fragrance, dip a toothpick in, and insert into the bottom between the 2 pieces of felt. Make sure that you can still see the tip of the toothpick so that you can grab with tweezers and add more oil when desired!
- Now you have a cute and unique car air freshener that you can re-use and add scent to time and time again.

DONUT DESIGN
- Print stencil & cut out shape.
- Outline the donut shape on your color choice of felt in pen and then cut exactly on the pen lines to reduce the chances of the pen showing. Also cut out the donut frosting.
- If you would like to add detail on one or both pieces of felt with the embroidery floss, do that before sewing them together. If you can still see pen marks, make that the “inside” of the donut. I just did one stitch in various colors to look like sprinkles on the frosting. I only added a pattern on one side.
- Now sew the 3 layers together starting on the inside circle using a blanket stitch around the edge, this stitch is actually very easy, you can watch the tutorial here.
- Then stitch a dashed line around the frosting attaching it to ONE layer of felt. Be careful not to sew the back layer. Once you finish attaching the frosting, attach the front and back pieces with the blanket stitch.
- Stuff the piece every inch or so as you go around the donut shape, you can use scissors or a capped pen to tuck the batting in.
- Once you have closed up the edge, add a small loop at the top so you can attach an elastic or string and hang from your rearview mirror.
- Choose an essential oil or fragrance, dip a toothpick in, and insert into the bottom between the 2 pieces of felt. Make sure that you can still see the tip of the toothpick so that you can grab with tweezers and add more oil when desired!
- Now you have a cute and unique car air freshener that you can re-use and add scent to time and time again.
Other uses:
This project does not have to have one purpose, here are some additional ideas that you could use the felt designs for:
- pin cushion
- rear-view decoration without scent
- keychain
- quiet toys for your kids
- decorations
- tree ornaments
Let me know if you guys have any questions, encounter any problems or have some other suggestions for uses of this fun little project!

